Origami and Water Color Fishing Scene
Book Inspired Art Projects
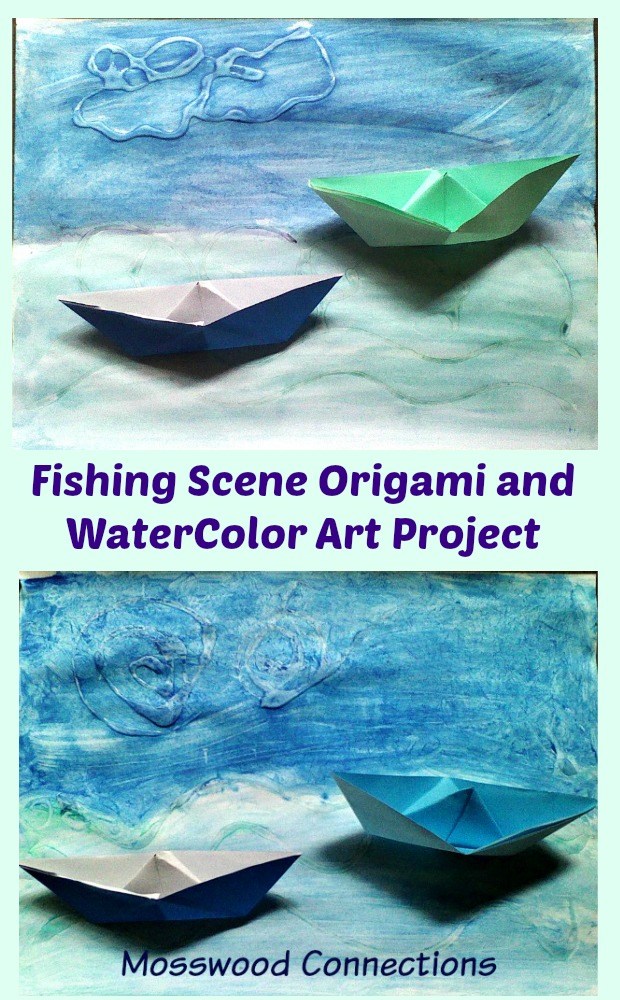
Picture books bring the world into the lives of our children and spark their imaginations. While reading the book In a Village by the Sea by Muon Van, we were so enchanted by the story and the illustrations by April Chu that we were inspired to try to create our own fishing scene Origami Watercolor Art Project. We combined a few different art techniques to try to capture the magical feeling of a fishing boat at sea. The kids had so much fun playing with watercolor, glue, and origami that they wanted to frame their creations when they were done.
This page contains affiliate links. Please visit our disclosure page for more information.
Target Skills for an Origami Watercolor Art Project:
Connecting with literature, fine motor skills: hand strength, finger isolation.
Materials you need to make an Origami Watercolor Art Project:
Large sheet of paper, Glue, paint or Watercolors
, Paintbrushes
, and origami paper
.
Instructions on how to make an Origami Watercolor Art Project:
We wanted some of that feeling of movement that April Chu’s illustrations have, Rather than have the kids use ink, (which is an alternative if you do not want to wait for the glue to dry.), we wanted to incorporate some hand strengthening into the art project so we used glue to make the lines of the waves and the clouds in the sky. Allow plenty of time for the glue to dry.

Boat Scene Glue

Fishing Scene Painting

Make a mountain fold in the center as shown in the photo and make a sharp crease in the paper.

Fold again to arrive at a square paper fold as shown in the photo.

Fold diagonally the top flap of the square fold as shown.

Repeat folding the bottom flap of the square fold to arrive at below triangle Origami fold. Crease well. Open up the triangle fold as shown and join the top corners to arrive at a square fold.

Open up the square fold by holding the outer flaps and expand to make a little Origami Boat! If you feel confused by these directions you can watch a video:
